Deep Dive on Enphase IQ7+ Microinverter and IQ Combiner 4 Box
In-depth look at the things that turn DC power into AC...
“Why is shade REKKING my solar power output?”
As we all know shade is the enemy of solar power production but what a lot of people I’ve spoken to over the years didn’t know is just how much of an enemy it can be. If you have a string array where the panels in each cluster are connected in series, any shade on a single panel will decrease the current output of all panels in the string.
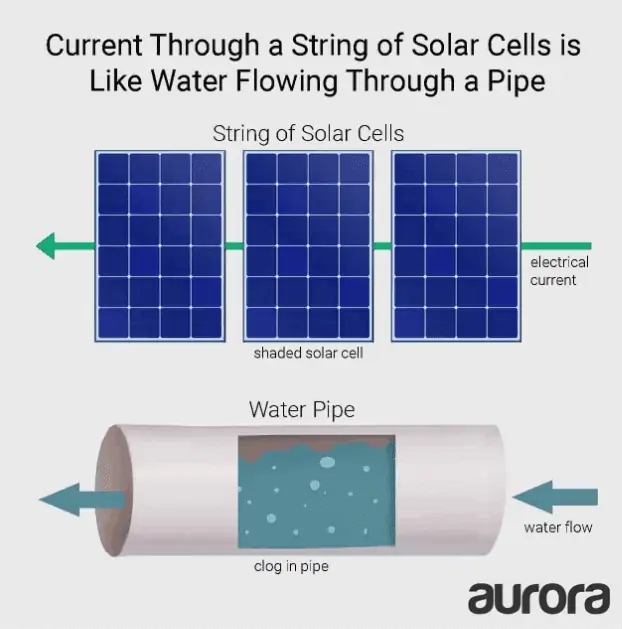 Image courtesy of Aurora Solar
So why connect panels in series? Well the average voltage output of a 400W solar panel is 48V give or take depending on the cell design, and connecting panels in series mitigates voltage drop across longer distances between the panels and your string inverter. This is fine in a large scale or commercial installation where the only shade would be cloud coverage, and the distance between panel clusters and the inverters could be a fair distance. However for a residential installation this doesn’t make much sense. Not to me, at least.
To effectively mitigate the effects of shade the number of elements affected by it needs to be reduced. In short, this means as many parallel connections instead of series as possible so that the reduced output of one panel won’t affect any others. In a commercial installation this might not be as cost effective as series arrays, however in a residential installation this is definitely the much better option, and using microinverters accomplishes this.
When I first inquired about solar last year I reached out to three different companies. I had already done a lot of research on my own dating back to 2019 and I knew going in that I wanted a microinverter setup so that I didn’t have super thick wires going across my house roof and potentially running underground from my pergola to the house. Much to my extreme disappointment none of the companies I contacted did microinverter installations, preferring to instead use string setups with MPPT (Maximum Power Point Tracking) and a giant inverter box that would go either outside or next to my main breaker panel. This is not at all what I wanted.
My solar inquiries took me to the end of last summer, to the point where if an installation were to occur it would be in the dead of winter or spring of this year. But since nobody I had talked to seemed to know how to install modern residential technologies I decided to revisit this in March in the hopes that what I had in mind could be finished by the beginning or partially into summer. Since my previous inquiries were all referrals I decided to give Google another try and that’s how I found the company I’m using now. The first question I asked was if they did microinverter installations and when they said “yes” I jumped for joy. But enough about my life, time to take a look at a day in the life of a microinverter.
Microinverters have been available for residential installations for nearly 15 years but they have been a boon for home solar because they allow for complete scaling if the array is ever expanded and they eliminate a single point of failure. Additionally they convert DC to AC power right on the back of the solar panel (the microinverter gets mounted to the rigging rail behind the panel) so there is virtually no voltage drop before power is converted, and because of the mounting location there is no large inverter to install at another location. Another bonus is that since you get 240VAC effectively at each panel, you don’t need thick gauge wire to carry lower voltage at higher currents to an inverter or interconnect. For example: in the US 12-gauge wire is rated to carry 20 amps of current. Multiply that by 240v and you get 4800W of max power delivery. That’s 12 400W panels at peak power production in a single wire. By contrast if you are carrying 4800W of power at only 48VDC that’s 100 amps of current, which would need 2-gauge at minimum or thicker depending on the length of the wire run. I don’t know about you, but that just sounds like overkill.
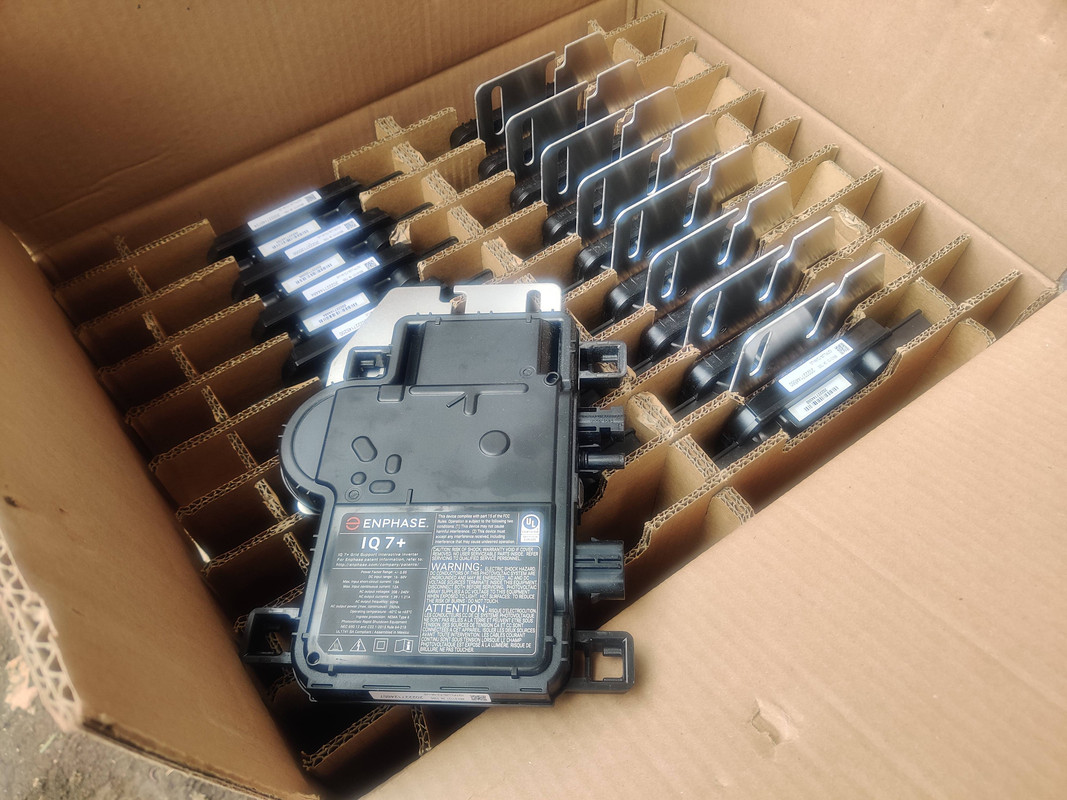
![]() Example of Enphase Microinverters mounted to the same rail that accepts solar panels. All of this will be hidden by the solar panel itself once mounted.
Example of Enphase Microinverters mounted to the same rail that accepts solar panels. All of this will be hidden by the solar panel itself once mounted.
So if you combine all of the benefits above with the parallel wiring connections, now if a single panel experiences shade, no other panel will be affected. And since all of the wiring connections happen after power is converted to 240VAC, the same voltage flows into the Enphase combiner (main control box) with the different parallel currents adding together. When it comes to combining AC power sources, it’s MUCH easier to combine different currents than voltages.
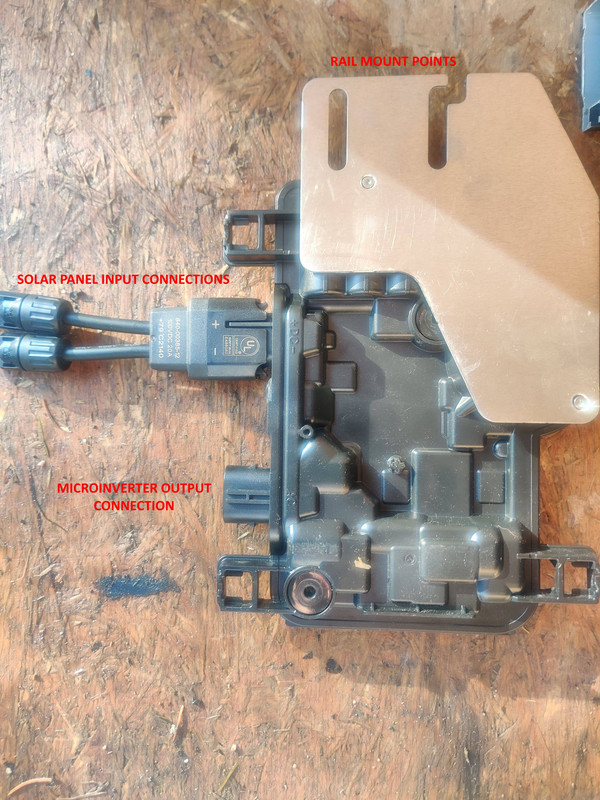
The microinverters being installed on my house and pergola are the IQ7+ model from Enphase. With a metal bracket just like that shown above the inverter mounts to the rail behind the solar panel, and then a splitter pigtail that receives the positive and negative wires from the solar panel connects to the input port on the side. The output port connects to a trunk cable that daisy chains inverters in parallel. The trunk cable itself is available pre-terminated based on portrait or landscape panel orientation, or as a roll of cable with connectors that can be placed at any location to accommodate the locations of the microinverters.
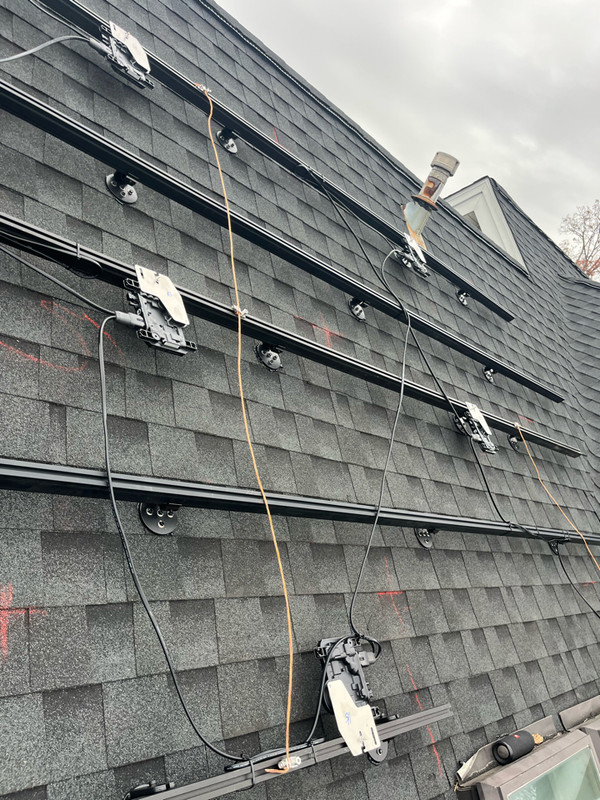 The IQ7+’s mounted above my kitchen roof. I’m assuming these were pre-terminated.
From the datasheet the IQ7+ can accept a solar panel between 235W and 440W in a variety of cell configurations (my REC405AA panels are 132 half-cell) with an operating voltage of 16-60VDC. The microinverter then converts this to 240VAC with a maximum continuous output current of just 1.21A. As mentioned before, because of the lower amperage this makes connecting panel arrays together much easier and cost efficient due to the lack of needing super thick wires. Running the math though, you may notice that 240VAC • 1.21A • 1.0 Power Factor = 290W which is substantially lower than the 440W max input, as well as the 405W max input from the panels that are being installed on my house and pergola. The reduced output is what is known as clipping.
Clipping is where the microinverter’s max output is lower than its max input due to the inversion circuitry used. While there are microinverters that will generate higher wattage output, there are two things to bear in mind: 1) the solar panels themselves will only be generating at peak output for a short time each day, and 2) using a microinverter that will generate a max operating AC output comparable to the peak DC output of the solar panel will almost always be less cost effective if not outright prohibitively expensive. This article from AC Solar Warehouse goes into more depth with real world numbers and why clipping isn’t as big an issue at it might seem at first glance: https://www.acsolarwarehouse.com/news/worried-about-clipping-dont-be. On a side note, knowing that research laboratories have successfully created a solar cell that is roughly 40% efficient, about double current industry standards, the microinverter market is eventually going to have to catch up to this.
Lastly, and this is what impresses me the most, is the IQ7+’s ability to communicate with the Enphase ecosystem. When using the Enphase app not only can you monitor the array output and status, but you can monitor each individual solar panel and microinverter to see individual energy production and diagnose problems as they occur. This will sound a lot like product promotion, but there really is something to be said for not having to hook a multimeter up to a live wire to check its output, and not having to potentially inspect each panel and microinverter in the event of a failure. The Enphase Combiner box is what monitors and controls all microinverters in the system, with the IQ Combiner 4 being the model installed at my house.
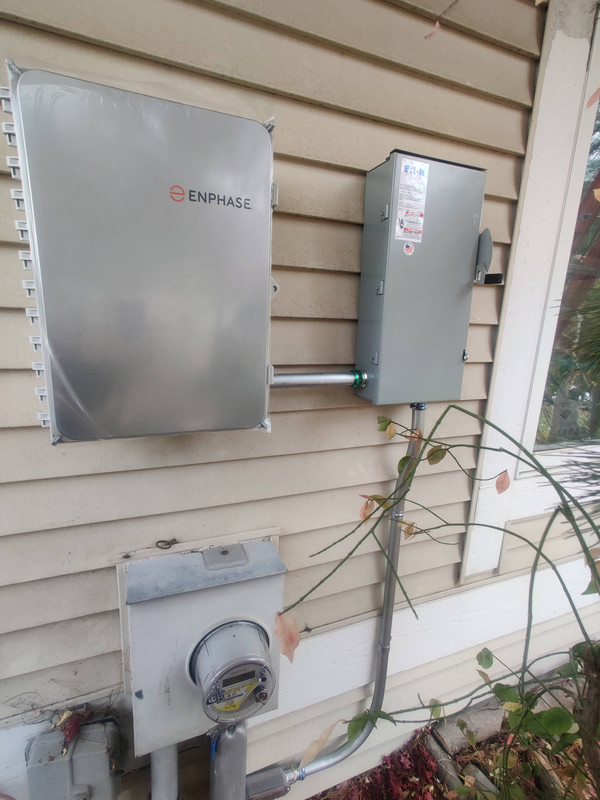 Enphase IQ Combiner 4 on the left with a knife switch disconnect on the right. The conduit from the disconnect feeds into the disconnect breaker for the house which is directly behind this wall in my garage.
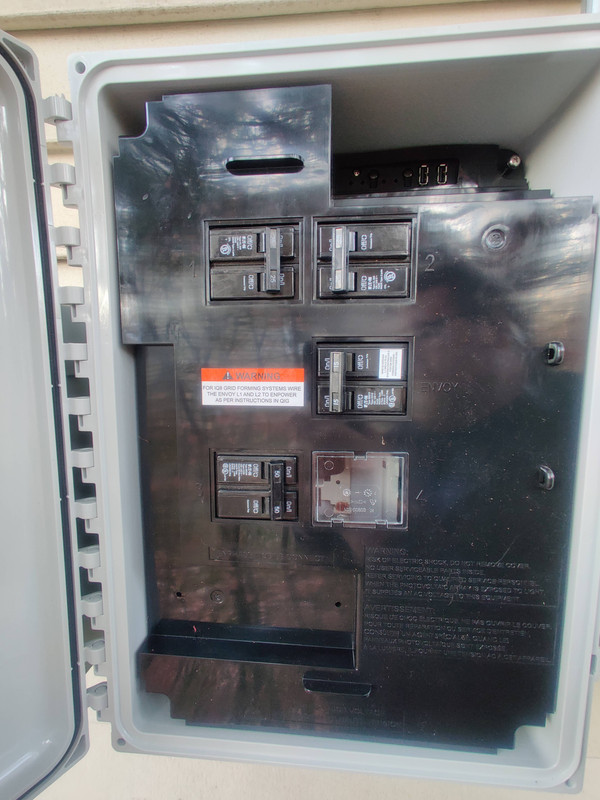 The top two breakers (25A) and lower left breaker (50A) are incoming power from the IQ7+ microinverters. The 15A breaker in the middle on the right powers the Enphase control circuitry behind the black plastic. The empty space in the Breaker 4 position would be occupied if I were installing a battery system.
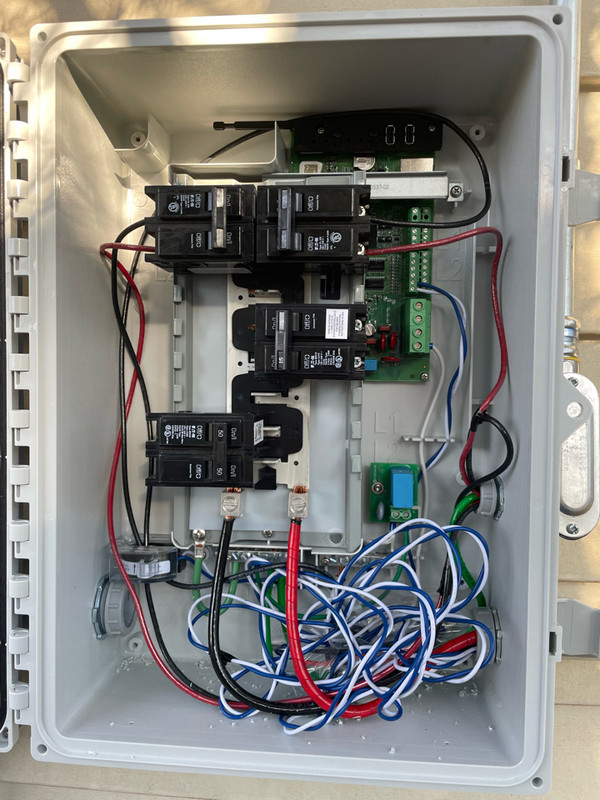 The house arrays are connected to the top breakers. The wires for the pergola array, once pulled, will come through the conduit in the lower left corner and connect to the remaining breaker. The thick wires at the bottom of the bus bars connect to the house disconnect inside my garage behind this wall.
There isn’t a whole lot to dive into with the combiner, it really is a glorified breaker box. The IQ Combiner 4’s primary function is to, as the name implies, combine all of the power generated from the microinverters into a single output, which is then connected to the electrical grid. The combiner also controls and monitors each of the microinverters in the array and connects via WiFi, ethernet, or cellular (if you purchase the LTE modem for this) to allow for real-time readouts of the array. After speaking with the electrician the white and blue wires attach to inductive sensors that monitor the current flow. One is in the combiner box (the black plastic looking ring in the lower left of the box) and two more will be installed in the main disconnect for the house, one on either side of the breaker. Since voltage monitoring can be done by simply probing electrical connections in parallel, this is done via direct connection to the respective monitoring points. And that just about covers the combiner.
If I discover anything else about the internal workings of the microinverters or the combiner box I’ll be sure to update this post with any relevant information. The next deep dive will be the monitoring software but that will be after the solar install is completed and the panels are back-feeding the grid.

