Immich ... but LXC
Oh you're running Immich? Cool! Wait ... without Docker? WAT?!

I first learned about Immich last year in a homelab Reddit post. Once nice thing about the beautiful diagrams various posters take the time to make is you get a nice long list of ideas of what to mess around with in your spare time. I’ve been off-and-on looking for a replacement for Nextcloud since the Android app has been leaving a lot to be desired of late, and while Immich is only designed to handle photos and videos (I use NC to also sync SMS backups and music), it’s basically a self-hosted clone of Google Photos, so I figured it could cover the photo/video backups while I looked into something else for the rest. But what put me off from checking it out for so long was that as of writing this, it is only available as a Docker image. The official documentation doesn’t even mention bare metal installations on a single Linux distro. That was a little off-putting.
I don’t like working with Docker if I can avoid it. I don’t hate it, and I’ve worked with it enough to understand the ins and outs, but from a practical standpoint using Docker in Proxmox is just an extra layer of virtualization that doesn’t need to happen. Maybe eventually the hypervisor will implement an option to choose between Docker and LXC for containers, after all Proxmox is Debian-based which supports both, but there are two reasons why at present I avoid Docker in my homelab: no container management in the Proxmox web UI, and unless I’m creating and managing Docker containers at the OS level (which is not good practice unless you’ve got a machine dedicated to this exact experiment) I have to do nested mounting of external storage. For Docker container management there’s Portainer (and plenty of other managers), which by itself works fine, but it’s extra overhead because I would literally need another Docker container to manage the containers. And as for the nest mounting of external storage, any service I host that has important data, like the photos and videos for Immich, gets a ZFS volume attached to it. This yields two benefits: container backups now only include the container software so they don’t expand (or expand very little) over time, and the data is more easily accessible to other services (if needed) and network shares. But to create a Docker container on Proxmox that isn’t part of the OS itself I’d need to create an LXC container first, which is the best way (that I know of) to install Docker on Proxmox with the least amount of overhead. Then the external storage gets mounted to the LXC container, which I then would need to mount to the Docker container inside the LXC, hence the nested mountings. For one or two mounts this can be only a minimal headache, but more than that, especially with mutiple users and different permissions thrown into the mix, it’s super easy to get lost.
Permit me to ramble some more? Thanks, your patience is appreciated. I used to use Google Photos for my phone’s photo/video backup needs, and the service doesn’t have anything inherently wrong with it, I just ran out of space in my 15GB free account. Each year I transfer my previous year’s email to an offline backup, so the vast majority of the data on my Google account is just the media. I could of course pay for the storage upgrades, which at present are $2 USD/month for 100GB of space, $10/mo for 2TB, or $20/mo if I want the AI upgrade with 2TB of space (I’m not factoring in sign-up discounts with these prices), but this becomes $24, $120, and $240 per year respectively just to host files for me. At present I can get a brand new 2TB SSD for under $100, even less if I buy used, so in just one year I spend less hosting the files on my own network. Even if I bought two drives to make a ZFS mirror, which I’ll be honest this is the minimum I would do for important data, that’s still well under $200, so in less than two years I would already have broken even. Some people will go through their media and delete old stuff or delete duplicates, I am not one of them. So my storage needs will only expand over time. The other bonus to self-hosting is I have control over my data: nothing gets sold without my knowledge, nothing gets fed to an AI for training,
On my Proxmox serer that I put together earlier this year I originally created three ZFS mirrors out of six 3.84TB SSDs for various forms of data storage. I’ve since consolidated two of those mirrors into a 4-drive striped mirror (ZFS RAID 10), yielding 7.68TB of usable space (minus the ZFS overhead) for Immich. I haven’t decided on the final CPU core count and RAM allotment, but at present the container has 8 CPU cores, 8GB of RAM, and a 16GB virtual disk. When doing the mass migration of photos and videos Immich certainly was using everything I threw at it. But I’m getting ahead of myself.
If I were installing Immich as a Docker container it would be as simple as running the compose script with pre-allocated resources and then spending two hours configuring the storage. But I’m doing things the hard way for the sake of minimizing overhead and simplicity elsewhere. In fact I originally started this project back in January but because of various failures during the installation process (some of which were likely a lack of understanding on my part) it took until now for me to get Immich running. To my embarrassment I’m pretty sure the attempt count in the end was over a hundred. The first guide I followed was written by Arter97 on Github, which can be found here. After about ten attempts with Ubuntu and Debian LXC containers I gave up. Now, I have absolutely nothing against Github guides that don’t work, it’s just that they either didn’t work when I was using them, or my own lack of understanding prevented my success. The next one I found was by loeeeee. I got further with this but I still had issues. I encountered a few errors along the way, but I seemed to make it to the end, at which point, naturally, the Immich services didn’t start. So once again, after about twenty or so attempts, I tabled it for another day. Then earlier last month I revisited the same guide and gave it another try. It still took me many attempts because I hit one snag that I’ll bring up later with the details of my install experience, but I made it to the end and most importantly, it worked! So why around a hundred install attempts? Well some of them were getting the mounted storage working properly (more on the specifics later) with the intention being once I got Immich and the storage working as intended I would document everything (which I did as went) and then destroy the container and remake it again so my backup would be as clean an install as possible.
As NetworkChuck would say “now’s a good time to get a cup of coffee”. While I don’t drink coffee, I do recommend grabbing your beverage of choice (or a bathroom break) because I’m finished rambling. It’s time to finally dive in.
The Github guide that ultimately worked for me was Amhehu’s which was a simplified version of loeeeee’s. Since they specifically mentioned success with a Debian 12 LXC container I chose that as my template. As mentioned before I gave the container eight CPU cores, 8GB of RAM, and 16GB of disk space. Once I’m done with testing and data migration for the other users in my family I’ll bring these down to maybe two cores and 4GB of RAM. Once created I first ran apt update as one always should after a fresh install and then since I would need it later I installed git, after which I cloned Amhehu’s repo.
1
2
3
apt update
apt install git
git clone https://github.com/Amhehu/immich-native.git
I then proceeded to install the dependencies per the guide’s instructions. The five main ones were Node.js, PostgreSQL, Redis, pgvector, and FFMPEG. Take note that I removed any instances of sudo from the dependency websites since all procedures are done as the root user unless specifically instructed otherwise per the guide.
Node.js installation
These instructions are taken from the Debian instructions for Node.js repo on Github.
Install Curl:
1
apt-get install -y curl
Download the setup script:
1
curl -fsSL https://deb.nodesource.com/setup_23.x -o nodesource_setup.sh
Run the script as root:
1
bash nodesource_setup.sh
Install Node.js:
1
apt-get install -y nodejs
Verify installation:
1
node -v
PostreSQL installation:
The instructions are taken from the Debian installation section of the PostgreSQL website but tweaked for LXC.
1
2
apt install -y postgresql-common
bash /usr/share/postgresql-common/pgdg/apt.postgresql.org.sh
Redis installation:
1
apt install redis-server
PGVector installation:
1
apt install postgresql-17-pgvector
FFMPEG installation:
1
2
3
4
5
6
7
8
9
10
11
12
apt install curl gnupg
mkdir -p /etc/apt/keyrings
curl -fsSL https://repo.jellyfin.org/jellyfin_team.gpg.key | gpg --dearmor -o /etc/apt/keyrings/jellyfin.gpg
export DPKG_ARCHITECTURE="$( dpkg --print-architecture )"
cat <<EOF | tee /etc/apt/sources.list.d/jellyfin.sources
Types: deb
URIs: https://repo.jellyfin.org/debian
Suites: bookworm
Components: main
Architectures: ${DPKG_ARCHITECTURE}
Signed-By: /etc/apt/keyrings/jellyfin.gpg
EOF
Note: after making this file I had to manually edit the /etc/apt/sources.list.d/jellyfin.sources file and remove the line spaces in order for apt update to work again.
Other dependencies:
1
2
3
4
5
6
7
8
9
10
11
12
13
14
15
16
17
18
19
20
21
22
23
24
25
26
27
28
29
apt install --no-install-recommends \
        python3-venv \
        python3-dev \
        uuid-runtime \
        autoconf \
        build-essential \
        unzip \
        jq \
        perl \
        libnet-ssleay-perl \
        libio-socket-ssl-perl \
        libcapture-tiny-perl \
        libfile-which-perl \
        libfile-chdir-perl \
        libpkgconfig-perl \
        libffi-checklib-perl \
        libtest-warnings-perl \
        libtest-fatal-perl \
        libtest-needs-perl \
        libtest2-suite-perl \
        libsort-versions-perl \
        libpath-tiny-perl \
        libtry-tiny-perl \
        libterm-table-perl \
        libany-uri-escape-perl \
        libmojolicious-perl \
        libfile-slurper-perl \
        liblcms2-2 \
        wget
Once all of this was done the next step was to create the Immich user account. This gives the Immich service a non-root user to run as for security purposes.
1
2
3
4
5
6
7
8
9
10
adduser \
  --home /var/lib/immich/home \
  --shell=/sbin/nologin \
  --no-create-home \
  --disabled-password \
  --disabled-login \
  immich
mkdir -p /var/lib/immich
chown immich:immich /var/lib/immich
chmod 700 /var/lib/immich
Up next was creating the PostgreSQL database. This database is password protected and you specify the password in this step. Replace YOUR_STRONG_RANDOM_PW below with your actual password. You do need the single quote marks.
1
2
3
4
5
6
7
su -u postgres psql
create database immich;
create user immich with encrypted password 'YOUR_STRONG_RANDOM_PW';
grant all privileges on database immich to immich;
ALTER USER immich WITH SUPERUSER;
CREATE EXTENSION IF NOT EXISTS vector;
\q
The next step was creating the ENV file and this was where I hit another snag in my previous attempts. I did not set the password in the ENV file but this didn’t stop the Immich services from running, so there was no indication there was a problem. So word to the wise: an incorrectly specified PSQL DB password will prevent the web interface from loading at all but you won’t see any error messages either.
1
2
cp env /var/lib/immich
chown immich:immich /var/lib/immich/env
1
nano /var/lib/immich/env
1
2
3
4
5
6
7
8
9
10
11
12
13
14
15
16
17
18
19
20
21
22
23
24
# You can find documentation for all the supported env variables at https://immich.app/docs/install/environment-variables

# Connection secret for postgres. You should change it to a random password
DB_PASSWORD=YOUR_STRONG_RANDOM_PW

# The values below this line do not need to be changed
###################################################################################
NODE_ENV=production

DB_USERNAME=immich
DB_DATABASE_NAME=immich
DB_VECTOR_EXTENSION=pgvector

# The location where your uploaded files are stored
UPLOAD_LOCATION=./library

# The Immich version to use. You can pin this to a specific version like "v1.71.0"
IMMICH_VERSION=release

# Hosts & ports
IMMICH_HOST=127.0.0.1
DB_HOSTNAME=127.0.0.1
IMMICH_MACHINE_LEARNING_URL=http://127.0.0.1:3003
REDIS_HOSTNAME=127.0.0.1
Once the ENV file was saved I made sure the install.sh script file could be executed.
1
2
cd /root/immich-native
chmod +x install.sh
After doing this I decided to take a look at the script and see if a specific version of Immich was being installed and sure enough there was, right in line #5 where it said REV=v1.131.3. This meant that the script wouldn’t automatically install the latest version, however in this case because this method of installation was completely unsupported by the Immich developers, I was fine with this. After checking that the latest version (at the time) was 132.3 I tried putting that in for the REV variable in the install script. With that done, it was time to run it.
1
./install.sh
This was when it was time for a legit five-minute break, but once completed I checked that both of the Immich services were running and, considering how many times I failed to get this working, I was immensely relieved that they were.
1
2
3
4
5
6
7
8
9
10
11
12
13
service immich status

* immich.service - immich server
     Loaded: loaded (/lib/systemd/system/immich.service; enabled; preset: enabled)
     Active: active (running) since Wed 2025-05-09 18:36:13 UTC; 2 weeks 1 day ago
       Docs: https://github.com/immich-app/immich
   Main PID: 104 (immich)
      Tasks: 23 (limit: 154374)
     Memory: 6.3G
        CPU: 5h 28min 40.878s
     CGroup: /system.slice/immich.service
             |-104 immich
             `-357 immich-api
1
2
3
4
5
6
7
8
9
10
11
12
13
service immich-machine-learning status

* immich-machine-learning.service - immich machine-learning
     Loaded: loaded (/lib/systemd/system/immich-machine-learning.service; enabled; preset: enabled)
     Active: active (running) since Wed 2025-05-09 18:36:13 UTC; 2 weeks 1 day ago
       Docs: https://github.com/immich-app/immich
   Main PID: 103 (gunicorn)
      Tasks: 17 (limit: 154374)
     Memory: 160.2M
        CPU: 3h 51min 56.767s
     CGroup: /system.slice/immich-machine-learning.service
             |-   103 /var/lib/immich/app/machine-learning/venv/bin/python3 /var/lib/immich/app/machine-learning/venv/bin/gunicorn immich_ml.main:app -k immich_ml.config.CustomUvicornWorker -c immich_ml/gunicorn_conf.py -b 0.0.0.0:3003 -w 1 -t 300 --log-config-json log_conf.json --keep-alive 2 --graceful-timeout 10
             `-118291 /var/lib/immich/app/machine-learning/venv/bin/python3 /var/lib/immich/app/machine-learning/venv/bin/gunicorn immich_ml.main:app -k immich_ml.config.CustomUvicornWorker -c immich_ml/gunicorn_conf.py -b 0.0.0.0:3003 -w 1 -t 300 --log-config-json log_conf.json --keep-alive 2 --graceful-timeout 10
It was time for the moment of truth: was the web UI going to load? I … may have jumped for joy a bit when I saw this:

The first step was to create an admin account as shown below. I skipped enabling Dark Mode for the moment because I use the Dark Reader extension in my browser and I wanted to play around with which I liked better later on. I left the Map and Version Check options enabled in the Privacy Settings. When I got to the Storage Template screen I initially left this disabled since I didn’t understand (at the time) what it was and I couldn’t configure it at the prompt, however I enabled this later on in the Administration section. After that I was finally presented with the landing page.


Clicking on the user dropdown and then Administration let me configure the rest of Immich. I left most of the settings alone but I did increase the thumbnail generation concurrency from 3 to 100 to speed up the process when dumping my phone’s entire photo and video contents. It was also here that I learned about the Storage Template and how to configure it, which prompted me to enable it as I mentioned earlier. The default template sorted photos into folders first by year, then by full date, then by file name. I felt this was a bit excessive and since the content on my phone was sorted by album (camera roll, download, SMS chats, etc) I opted to mirror that template in Immich so I changed the format to album and then file name.


This also, to me, made it easier so that I could create separate albums on Immich (e.g. specific vacations, wedding photos, etc) but always have all of the photos from the original master albums accessible. I haven’t done this yet, but I plan to at some point. I do like how you can configure your own storage template to fit your organizational needs and that you have a lot of variable options.
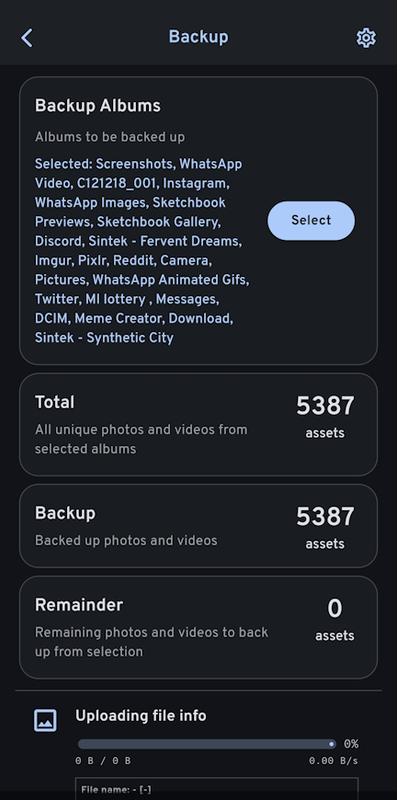
I opted to wait until I had successfully uploaded all of my content before creating the other user accounts, especially since I was doing mounted storage, so the next step was logging in via my phone and then configuring the folders to upload. Once logged in I immediately saw all of the content on my phone. Tapping on the cloud icon in the upper right brought me to the Backup screen where I could add albums to be backed up. With over 5000 items to be backed up, now you can see why I cranked up the thumbnail generation concurrency.


Overall I was very impressed with the upload speed because the bottleneck for something like this is file access and metadata, not the upload speed itself. I think the entire upload took around an hour and a half, though I must confess I was playing a video game while I was waiting so I wasn’t exactly keeping precise track of time. But I didn’t get any errors after the upload and everything was present when I refreshed the web UI on my desktop. But the next thing I did was to delete everything so that I could mount the external storage to the correct locations now that I knew where the upload paths were. Unfortunately as near as I could tell Immich doesn’t consolidate the thumbnails, video transcodings, and other library-related files in the same place, so I had to create a series of folders in the ZFS share that I was mounting to the LXC container, mount the ZFS volume at the top-most folder level, and then create symbolic links inside the LXC to the corresponding Immich paths. Those paths were backups, encoded-video, library, profile, thumbs, and upload with the library folder being the one containing the original file uploads. Once the ZFS volume was mounted in Proxmox I used the following command inside the LXC to create a symbolic link to each of the Immich upload paths. Note that the path for the Immich folders only pertains to any installation that follows the guide I used. Other installations I’ve tried had different installation paths, so bear in mind you will need to modify the path to match your installation.
1
ln -s /ZFS_path/ /var/lib/immich/upload/[folder name]
With that done it was time to re-upload my content again. This time I did clock the transfer time and it came in at 1hr 44min. Not too bad for nearly 5400 items over WiFi. I also monitored the Storage Space meter in the lower left corner of the browser window. While the usage did increase slightly, it was much smaller compared to the first time around, so I know the only usage that resides inside the LXC container is for the PSQL database. I haven’t ultimately decided yet whether I want to store that on mounted storage or not. It’s certainly not that big, a grand total of 3.8GB for a full backup of the LXC container is certainly a microscopic amount for the ZFS pool in which my Proxmox backups reside. Considering I know next to nothing about databases, let alone which file or files specifically would need to get stored on a mounted volume, I’m content with leaving it in the container for now, but if it ever increases to a substantial size, say 64+GB, in the future I’ll consider moving it.
All in all I’m very pleased with how this experiment has turned out. Immich has very quick response times, photos I take are uploaded within five seconds when on my home WiFi or VPN, the update script from Amhehu’s guide works by just changing the version number inside the install.sh file (at least as of writing this), Samba also works to view the files outside of Immich, while I haven’t delved into it much yet the automatic facial recognition works very well (Captain Picard has his own profile thanks to the memes I uploaded which I find insanely hilarious), and the icing on the proverbial cake is I don’t have to ever entertain the notion of spending a single cent on a storage upgrade for my Google account.
So why go through all of this headache when I could have just created a Docker container inside an LXC, spun up the Docker image, and called it a day? My personal preference for not using Docker aside, I learned a few things along the way that will definitely prove useful in the future (like creating symbolic links instead of individually mounting a bunch of storage paths). Fans of Star Trek VI may recall Kurtwood Smith’s line near the end “just because we can do a thing, it does not necessarily follow that we must do that thing” and in the context of my homelab the primary goal is to determine what can be done. Could Immich be installed without using Docker? How does it respond to using mounted storage? If I added a file through Samba would Immich detect it and update its database? What can be done with Immich that isn’t necessarily how the developers intended for it to be used, but could possibly suit one or more of my own needs either at all or in a better or more efficient manner?
This project was a long time in the making, but I’m glad I took it on and I’m pleased with the results. It was both a learning experience and a much needed addition to my homelab. If you use what I’ve written here to try Immich yourself in an LXC without Docker, I hope it works for you (who knows if something will break in the guides I’ve referenced in the future) and that I’ve been able to smooth out any bumps in the process, but most of all have fun with it. If you get a headache like I did in the early days, take a break. No shame in waiting for the ideas to come to you, or waiting on the people behind the project to fix or update something. Good things come to those who wait?
But speaking of good things it’s past 3AM so it’s time for me to get some good sleep! See you after the next experiment.